Showing posts with label sewing. Show all posts

Sunday, June 26, 2016

DIY High-Waisted Shorts

I just got back from a two week vacation overseas, and I returned home to realize that it is roughly one million degrees outside. And that's really great because I adore mega-heat and 1000% humidity (note my heavy sarcasm).

So, just like any other summer, I've taken part in my yearly ritual, which is to take some old and/or secondhand jeans and turn them into some shorts. Because ain't nobody got time for jeans in this kind of weather.


DIY High Waisted Shorts

I've talked about making shorts from old jeans in the past (namely in this post, which goes into more detail about this process), and it such a simple activity that sometimes I think it hardly bears mentioning. But here I am, cause ya girl wanted to make a post on this lonely blog of hers.

DIY High Waisted Shorts

The high-waisted trend has been around for a couple years now, and I've only been partaking in it for about a year and a half, but I can honestly say that I hope it sticks around. There's something about looking like a 90's soccer mom with pants up to her ribcage that I find completely endearing, and I mean that with complete honesty and affection. In the case of these shorts though, I don't think that my 90's mom self would really approve of rocking them because warning: I made mine pretty short.

I've found that the trick to making these shorts (or to even finding high waisted jeans) is to hit up your local goodwill and peruse all the sizes in the racks. I pay most attention to the size of the waistband and compare it to my own natural waist, which is different than shopping for jeans that will fit your hips, so just ignore the numbers. Mom jeans are much more forgiving in terms of sizing, I feel. Also, the easiest way to find mom jeans at a glance is to look at the zipper. Is the zipper as long as your whole hand? Then there's a good chance you'll be zipping those pants up to your eyeballs. Zipper only as long as your palm? Try again, compadre-- you're in weird mid-rise territory.

DIY High Waisted Shorts

Once I found the pair pictured here, I started just like I would with any pair of pants that I would want to make into shorts. First, I tried them on and marked with a pin where I wanted my shorts to come down to. It's important to try the shorts on, rather  than just laying another pair of shorts on top of them and marking them that way, because the rise of these pants is going to affect the length of the shorts.

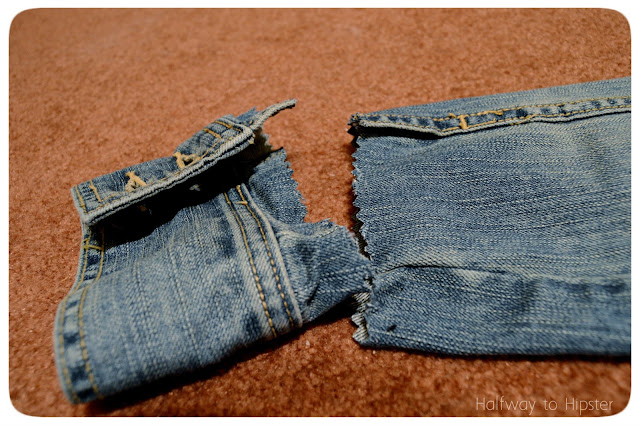
After trying them on and marking the length, I took them off, added an additional 1.5 inches of length so that I could cuff them, and chopped off one leg. I also cut them at a slight angle, just for funsies.

DIY High Waisted Shorts

Next, I folded the shorts over and chopped the second leg off in the same fashion. I told you, this is a super easy project.

DIY High Waisted Shorts

The last thing I did was to just cuff the shorts up, tack down cuffs with a few whip stitches, and call it a day. Simple, quick, and mildly tackily cute.

I actually have another pair of shorts that I still need to do this to, so I should probably get on that soon.... Guess that's my cue to go be productive!


Linking up:
x x

Saturday, January 23, 2016

Black and White Striped Dress Refashion

I feel a little weird about posting a refashion like this considering it's still quite clearly winter outside, BUT, in my defense it has been an unseasonably warm winter by me.

... as in it's been in the high 20's, low 30's, which is like crazy warm for here. Shhh, just let me justify posting about crop tops in January.

But quite some time ago, like an embarrassingly long time ago, I was visiting Carolyn when her neighbor was getting rid of some old clothes and ended up gifting me this dress:

Striped Dress Refashion

Now, you may be thinking-- Becca. That is a perfectly fine dress. Why would you mess with that?
While yes I agree it's a fine dress, it's just a little too short for my liking. As in, if I were to bend over, I might get charged with public indecency. And while I like to live life on the edge, I'm not that edgy so... yeah.

So, I finally turned it into not one, but two new things. Look at me go.

Striped Dress Refashion

Here is what I did to turn this dress from too short to... some things that were still pretty short. (also, please excuse the amount of cat hair in these photos. I am a terrible disaster of a person.)

Striped Dress Refashion

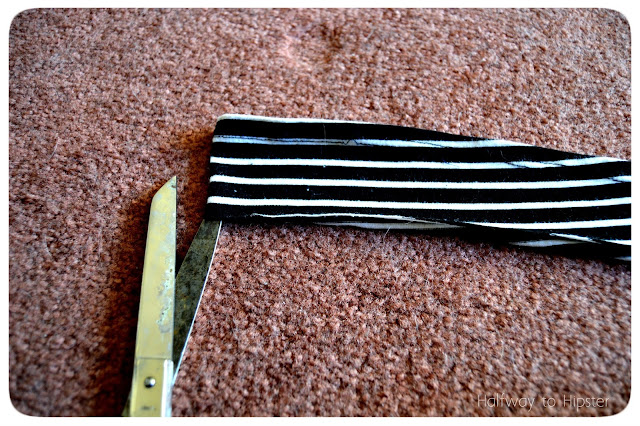
The first part of this refashion was really simple. All I did was lay my dress flat and chop off the bottom hunk in order to start turning this into a simple top.

Striped Dress Refashion

Although this is a knit fabric and therefore doesn't fray, I still folded the hem up once and ran a zig-zag stitch all the way around it just to give it a bit more polish.

Striped Dress Refashion

And just like that, this piece went from a too-short dress to a more acceptable length top. I didn't want to waste the extra fabric so I decided to take this refashion a step further (to be fair though, I never throw away any of my fabric scraps for environmental and crafty reasons that I can talk about at a later date maybe).

Striped Dress Refashion

For part two, I started by taking the extra piece of fabric and cutting it in in half.

Striped Dress Refashion

I then took those two pieces and pinned and sewed (again, zig-zag stitch) them together so that my top would have more length to it.

Striped Dress Refashion

After measuring this piece against my body, I decided that it was just a bit too long, so I took off some of the length and hemmed my bottom edge the same way I did for my first top.

Striped Dress Refashion

With right sides together, I folded the top in half, pinned the raw edges, and sewed the back of the top closed.

Striped Dress Refashion

I then took the piece of fabric that I trimmed off earlier and chopped that piece in half again.

Striped Dress Refashion

And then I folded each piece in half, pinned the edges, and sewed down the long edge. After sewing them down, I turned each piece right-side out in order to make my straps.

Striped Dress Refashion

Finally, I sewed my straps on in the locations that seemed best and adjusted the length of the straps so that they were not too long or too short. I also did a tiny little pinch and gather at the front of the top but I forgot to photograph that part, so my bad.

Striped Dress Refashion

But now I have a fun little crop top that is totally winter appropriate. I'm pretty jazzed about the way that the back looks at least. I could lie and say that I planned it that way, but we all know that I do not have that much sewing foresight. Ayyy, happy accidents.

For now I'll be stashing this away with the rest of my tanks, but hopefully I can get good use out of both of these new tops come summer time!


Linkin' up:
x x
Sunday, August 9, 2015

Everyday Cosplay: Mark of Gandalf Vest

I have fully accepted that one of my ideal fashion aesthetics is the idea of "casual nerd."
Like the kind of thing that you can wear out in public and people who aren't in your fandom just think "Huh, that's interesting." Nothing suspicious about it. But little do they know: BAM. You're a raging nerd baby.

That is me. This is my life now.
Which brings me to one of my latest creations:

Everyday Cosplay- Mark of Gandalf Vest

I will be the first one to admit that I have an unhealthy obsession with Lord of the Rings/The Hobbit. So much so that it's taking over my fashion choices. But let's be real here-- who wouldn't want to wear the Mark of Gandalf on your back? You never know-- it might score you a troupe of dwarfs that will take you on an adventure. And I'm all about that adventure life, yo.

This was actually really quick and simple to make since I already had the vest which mostly fit, so I didn't have to do any alterations to it. But here is what I did do:

Everyday Cosplay- Mark of Gandalf Vest

Similar to the LOTR Biker Jacket, I started out by flipping the vest over and traced out the back panel onto a piece of newspaper. Please take note of that creepy face in the upper right corner because it haunted me for this entire project.

Everyday Cosplay-- Mark of Gandalf Vest

I then cut my pattern piece and measured it against the back. I made sure that my pattern piece was slightly larger than the seamed-out panel on the back though because it's a lot easier sewing if you're not having so hand sew through multiple layers of denim.

Everyday Cosplay-- Mark of Gandalf Vest

On a separate piece of paper, I traced out my Mark, making sure that it would fit nicely onto my other pattern piece. I decided to go with the mark that Gandalf puts on Bilbo's door in the first Hobbit film, akin to the general rune for "G" that he uses in other parts of the films. Though to be fair, I have recently learned that the mark that he used in the movie was more of a Peter Jackson invention, rather than a strictly canonical mark, but that really doesn't really bother me much. If' you're interested in what I'm referring to, check out this informative thread.

Anyway, I digress.

Everyday Cosplay-- Mark of Gandalf Vest

Once I was sure that my pattern pieces were just how I wanted them, I pinned them down, traced them onto felt and cut them out.

Everyday Cosplay-- Mark of Gandalf Vest

After cutting them out and putting them on top of the vest though, I thought that it looked a little plain, so I decided to make an adjustment.

(shout out to my foot in this photo)

Everyday Cosplay-- Mark of Gandalf Vest

I took the Mark, pinned it to some red felt, and cut around it, making about a half inch border all the way around.

Everyday Cosplay-- Mark of Gandalf Vest

And then I had to take a quick interlude because someone was hogging all of the fabric. Wow. Jerk.

Everyday Cosplay-- Mark of Gandalf Vest

I liked this look way better so I pinned the grey to the red, sewed that down, and then pinned the red to the black before sewing that down too. I just did a whip stitch all the way around because I like how that looks. I don't have a better reason.

Everyday Cosplay-- Mark of Gandalf Vest

Lastly, I took the whole thing and sewed it down to the vest using the same stitching as before.

Everyday Cosplay-- Mark of Gandalf Vest

Bonus: Look at this picture of Kitty going into warp speed.


And kachow.
More nerd. More Hobbit. With a slightly punk-rock, I'ma-beat-yo-ass-if-you-talk-trash-about-my-wizard kind of vibe. (You can talk trash about Thorin though. Hit me up if you ever want to have a debate about Thorin with me.)


So what do you think? Anyone else out there who would be willing to join Gandalf's gang? Because I'm ready to go.

Linkin' up:
x x


Monday, June 22, 2015

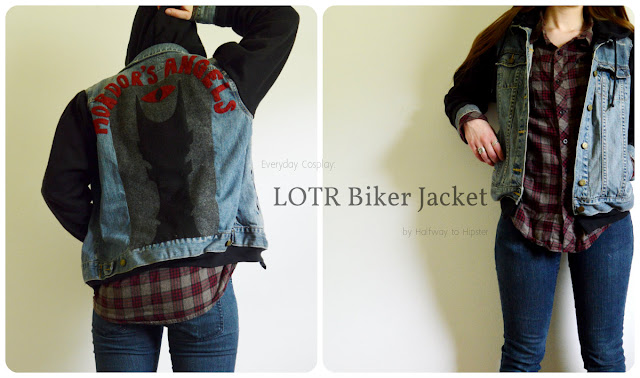
Everyday Cosplay: LOTR Biker Jacket

Do you ever start reading something or watching something with the intention of just ah yes, I will become a casual fan. That was me with Lord of the Rings until it consumed my soul. I'm in too deep, man. There is no going back.

But you want to know what? I'm perfectly fine with that because it makes me end up creating little beauties like this recent monstrosity:

Lord of the Rings Biker Jacket


I've seen these half denim/half sweatshirt jackets in stores before, and thought that I could make one for myself because it can't be too complicated, right? But then things got away from me and oops. Lord of the Rings. But hey hey, woah. Hear me out. Like look at how punny this is... like Hell's Angels... but instead it's Mordor's Angels? Get it? GET IT? Shhhhh, I'm hilarious.

And in reality, though a little bit time consuming, this was actually really easy to make!

Lord of the Rings Biker Jacket

I started out by taking two things that I already had in my closet that I no longer wear. The zippy sweatshirt is from a million years ago and the jacket is my mom's that she did not want. So basically, I made this whole thing with little to no costs; I just reused old materials that were just going to waste. Yaaaaay not being wasteful.

Lord of the Rings Biker Jacket

Using a seam ripper, I started off by removing the zipper from the sweatshirt. (And now I have a full length zipper that I can easily use in another sewing project.)

Lord of the Rings Biker Jacket

I then removed the hood of the sweatshirt, making sure to cut about an inch below the seam so that I could use that inch as seam allowance.

Lord of the Rings Biker Jacket

I then removed the sleeves, again cutting about an inch in from the original seam.

Lord of the Rings Biker Jacket

I then attached the hood to the jacket by folding up the collar, pinning the hood inside, and sewing down the extra inch of fabric with a straight stitch.

Lord of the Rings Biker Jacket

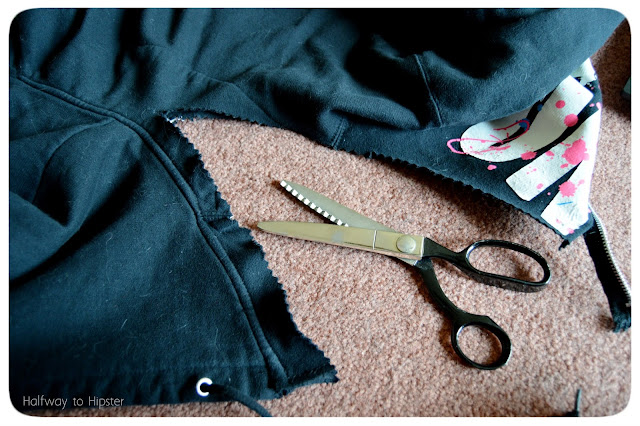
Using my pinking shears again, I took the sleeves off the jacket. Only this time instead of cutting into the body of the jacket, I cut to the right of the seams, leaving an extra inch of the sleeves to use as my seam allowance.

Lord of the Rings Biker Jacket

In order to attach the new sleeves, I started by turning the jacket inside out. Then, with the sweatshirt sleeves right-side out, I tucked them inside the jacket and pinned them in the armhole.

Lord of the Rings Biker Jacket

Since the new sleeves were a little bigger than the old sleeves, I did have to fidget with it a little and do a few gathers here and there before sewing them together right along the old denim seams.

Lord of the Rings Biker Jacket

It was at this point that Kitty decided to tell me you shall not pass. Cue slight delay in project.

Lord of the Rings Biker Jacket

Since the sleeves were a little short on me, I decided to extend them by cutting off the cuffs of the jacket and sew them to the inside of the sweatshirt sleeves.

Lord of the Rings Biker Jacket

I also decided to cut off the bottom of the sweatshirt and add it to the bottom of the jacket.

Lord of the Rings Biker Jacket

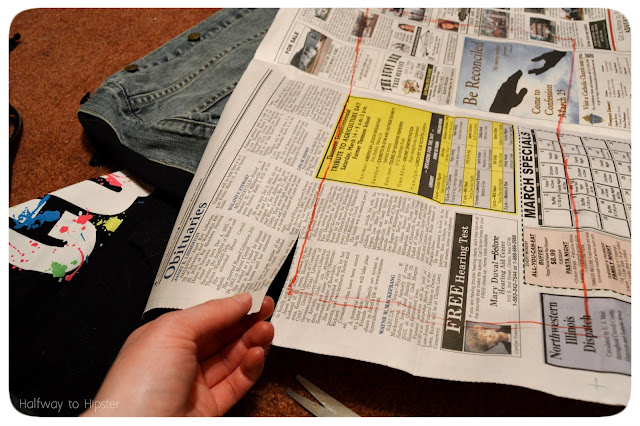
Finally, once I got the jacket constructed, I could start on the back of the jacket. I started by first laying some newspaper on the back of the jacket and tracing out how big I wanted the back patch to be. I then cut it out, folded it in half and trimmed it so that everything would be symmetrical.

Lord of the Rings Biker Jacket

I then pinned this to some felt, cut it out, and topstitched it onto the jacket.

Lord of the Rings Biker Jacket


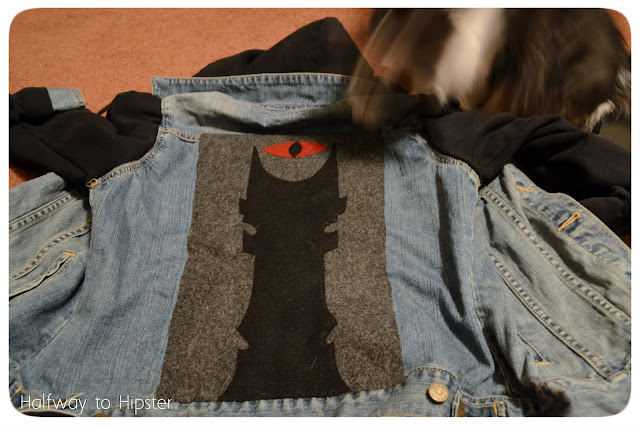
For the symbol, I looked up a picture of the tower of Barad-dûr on my smellphone and sketched out half of it like so. That way, when I pinned it to the fold of another piece of felt and cut it out, it was already symmetrical.

Lord of the Rings Biker Jacket

Once I got that all cut out, I topstitched it all onto the felt panel. Also, please appreciate how creepy this picture of Kitty is. Yay for long exposures and moving cats.

Lord of the Rings Biker Jacket

The final step was to add the words. I drew them out on some newspaper, and kind of just went with it. I could have made the font actually look nice, but at this point in time, I was just too stoked to have this done.

Lord of the Rings Biker Jacket

I cut all the letters out, pinned them to my felt backwards, and traced them out. I decided to do them backwards so that the pen wouldn't show up on the other side, which made for a cool clean effect.

Lord of the Rings Biker Jacket

Finally, after cutting out all of the letters, I pinned them where I thought then would look good and stitched them all down by hand (actually, everything on the back is hand-stitched btw).

Lord of the Rings Biker Jacket

And that was it! I'm not going to lie, this is probably one of my favorite things I have ever sewn (besides the Thranduil Dress). Like I'm just so jazzed about the outcome. I have not encountered someone else who has gotten the reference yet, but ONE DAY I WILL. And I'm sure that it will be a glorious occasion.

Lord of the Rings Biker Jacket

It's like in case you didn't already know that I'm a giant nerd baby, let's make horrible puns about it. And then put them on my body. Living the dream, I tell you. Living it.

So what do y'all think? Would you ever wear something that is secretly nerdy? I feel like it would be fun to make another, but what fandom would I even go with? I'd love to hear your thoughts!


Linkin'up:
x x