I feel a little weird about posting a refashion like this considering it's still quite clearly winter outside, BUT, in my defense it has been an unseasonably warm winter by me.
... as in it's been in the high 20's, low 30's, which is like crazy warm for here. Shhh, just let me justify posting about crop tops in January.
But quite some time ago, like an embarrassingly long time ago, I was visiting Carolyn when her neighbor was getting rid of some old clothes and ended up gifting me this dress:
Now, you may be thinking-- Becca. That is a perfectly fine dress. Why would you mess with that?
While yes I agree it's a fine dress, it's just a little too short for my liking. As in, if I were to bend over, I might get charged with public indecency. And while I like to live life on the edge, I'm not that edgy so... yeah.
So, I finally turned it into not one, but two new things. Look at me go.
Here is what I did to turn this dress from too short to... some things that were still pretty short. (also, please excuse the amount of cat hair in these photos. I am a terrible disaster of a person.)
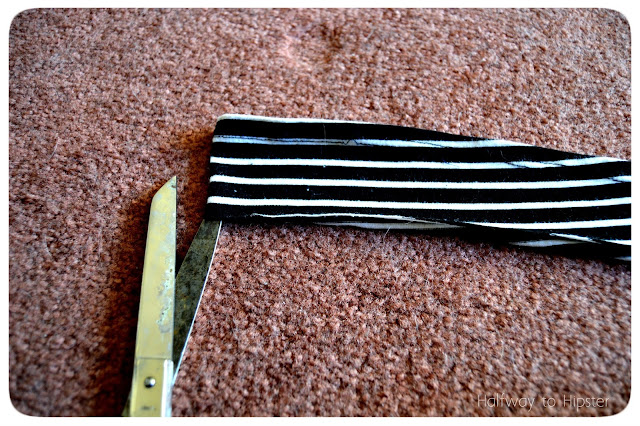
The first part of this refashion was really simple. All I did was lay my dress flat and chop off the bottom hunk in order to start turning this into a simple top.
Although this is a knit fabric and therefore doesn't fray, I still folded the hem up once and ran a zig-zag stitch all the way around it just to give it a bit more polish.
And just like that, this piece went from a too-short dress to a more acceptable length top. I didn't want to waste the extra fabric so I decided to take this refashion a step further (to be fair though, I never throw away any of my fabric scraps for environmental and crafty reasons that I can talk about at a later date maybe).
For part two, I started by taking the extra piece of fabric and cutting it in in half.
I then took those two pieces and pinned and sewed (again, zig-zag stitch) them together so that my top would have more length to it.
After measuring this piece against my body, I decided that it was just a bit too long, so I took off some of the length and hemmed my bottom edge the same way I did for my first top.
With right sides together, I folded the top in half, pinned the raw edges, and sewed the back of the top closed.
I then took the piece of fabric that I trimmed off earlier and chopped that piece in half again.
And then I folded each piece in half, pinned the edges, and sewed down the long edge. After sewing them down, I turned each piece right-side out in order to make my straps.
Finally, I sewed my straps on in the locations that seemed best and adjusted the length of the straps so that they were not too long or too short. I also did a tiny little pinch and gather at the front of the top but I forgot to photograph that part, so my bad.
But now I have a fun little crop top that is totally winter appropriate. I'm pretty jazzed about the way that the back looks at least. I could lie and say that I planned it that way, but we all know that I do not have that much sewing foresight. Ayyy, happy accidents.
For now I'll be stashing this away with the rest of my tanks, but hopefully I can get good use out of both of these new tops come summer time!
Linkin' up:
x x
Showing posts with label upcycle. Show all posts
Showing posts with label upcycle. Show all posts
Saturday, January 23, 2016
Thursday, May 22, 2014
Upcycled Dog Tag Jewelry
Oftentimes when I come home, I end up being confronted by my mother as such:
Mom: Becca. Look. I got these things.
Me: Yo. What. Oh. Okay.
Mom: Make something.
Me: Word.
*Direct quotes.
And it usually ends up with me creating something weird, but that's really no different than any other day of my life.
So last time I came home [... or some time... I don't remember... it was a little while ago], my mother showed me that she bought an entire jar of old dog tags. Why? Because of reasons I guess.
Therefore, I decided to upcycle them into some fun jewelry:
I have never seen dog tag like these ones before, but she got them from an antique store in the next town over [shout out to the tag that says Lucifer on it].
Once she gave me the tags though, I really just sat down and played around with some materials that I found in my basement: hemp, alligator clips, beads, glue, other items, and what not.
I did three main strings on both the necklace and bracelet-- one to contain the tag, a braided hemp strand, and a last string with knots and beads.
Then at the end, I just used some copper wire to attach all the strings together, then glued them with E6000 so that they stayed super-attached to the alligator clips. And just like that-- new life to old dog tags!
Side note: take note of the hella-dope para-cord bracelet that my oldest brother made me. I like to tell people that he enjoys man crafts. Because it's true.
But yeaaaah. These were pretty fun to make, and it was fun to give new life to another old material! Now I'm tempted to make something out of Gypsy's old rabies tags just because... hmmmm....
Linkin' up:
Subscribe to:
Posts (Atom)


