One of the upsides of going back to graduate school in the fall is that I get to move out of the garbage-hole of an apartment I have been living in for the past two years.
The downside? I'm going from a three bedroom apartment that actually had too much space for me to even use... to a 289 square foot studio apartment. We do what we gotta do in the name of education/living within our means, right? Right? Shhh, let me believe that I'm not an idiot, okay.
I'm actually pretty okay with this major downsizing though because it gives me a chance to reassess my possessions and completely redecorate a small, cohesive space. Because of that, I'm currently working on creating just some small decorative pieces to take with me when I move so that my new apartment feels a little more personal. One of the things that I think is going to work well in my space is this cute little beaded star garland:
It didn't take that long to make, and I think it's going to work well in the more neutral color palette that I think that I'm going to go with.
Curious about how I made it? Here is what I did:
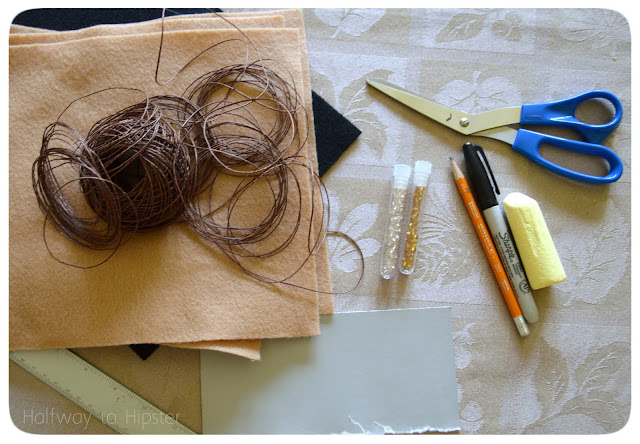
First, I gathered all of my materials: some string (I used hemp), small beads that the string can fit through, felt, a scrap of poster board, a pencil, sharpie/chalk for marking the felt, hot glue, and some scissors.
With the scrap of poster board, I started by creating the pattern for my star. I just free-handed my shape, but you could easily just print a star shape from Google and trace that if you want to be super accurate. I like to be wild and crazy and live life on the edge though.
Next, I folded a section of the felt over and traced out as many star shapes in a row that would fit. Leaving the pins in to help with the cutting, I cut a double thickness of the felt for each star.
I continued in this fashion until I had as many stars as I thought I would need. I ended up with three black stars and eight brown ones so that I could create an alternating pattern. That was it for the stars for now-- next, I tackled the garland part itself.
To create the garland string, I cut a really long length of string/hemp which was longer than I wanted the end product to end up. And by really long length, I mean like..... 10 feet. Homegirl ain't playin' around.
For each bead that I wanted to add, I started by tying a knot in the string.
After tying the knot, I would slide on a bead and tie another knot. Then I would move over an inch, tie another knot, slide on another bead, tie a knot, and continue on until I'd have five beads in a row (with alternating colors of course because why not).
After every five beads, I would leave a large gap for a star to go in until I had room enough for each of the stars that I had cut out. And that was it for the garland string. The only thing left to do was to go about adding the stars.
To add the stars, I would lay down a star, add a little hot glue to the center, stick the string down, and then sandwich another star on top.
I wanted to give the stars a little more polish, so I just whip stitched around all of the edges. Now that I'm typing this out it almost seems like this took a lot of work... but in reality this surprisingly didn't take very long. An afternoon's worth of work maybe?
However long it took, I'm pretty sold on this little creation. I can just imagine it hanging above the window in my future cardboard box of an apartment, which is kind of endearing.
For now though, I just have it hanging on this palette (that I made!) in my parent's house until I can take it to my new tiny-home. You know all those tiny home shows on HGTV? I've always wondered what it would be like to live in one, so I guess that's how I can think of my new studio apartment... Ayyyy, that's a cool thought.
Linkin' up:
x x


What a gorgeous little garland Becca. Neat tutorial too! Love, Mimi xxx
ReplyDeleteThis was a outstanding informative post you have shared on this page about the online courses because this Knowledge in a USA leading training networking Platform to provides courses for students, working professionals job seekers and corporate employees with placement assured but but I have NOT taken every single one of these, so I cannot fully vouch for all of them. If you do take one and it’s full of smarmy or BS,you must check the material of your study is related and also helpful in your study ,other your waste your time and loss of money . Hire Someone To Take Your Online Class
ReplyDelete