Showing posts with label refashion. Show all posts

Saturday, January 23, 2016

Black and White Striped Dress Refashion

I feel a little weird about posting a refashion like this considering it's still quite clearly winter outside, BUT, in my defense it has been an unseasonably warm winter by me.

... as in it's been in the high 20's, low 30's, which is like crazy warm for here. Shhh, just let me justify posting about crop tops in January.

But quite some time ago, like an embarrassingly long time ago, I was visiting Carolyn when her neighbor was getting rid of some old clothes and ended up gifting me this dress:

Striped Dress Refashion

Now, you may be thinking-- Becca. That is a perfectly fine dress. Why would you mess with that?
While yes I agree it's a fine dress, it's just a little too short for my liking. As in, if I were to bend over, I might get charged with public indecency. And while I like to live life on the edge, I'm not that edgy so... yeah.

So, I finally turned it into not one, but two new things. Look at me go.

Striped Dress Refashion

Here is what I did to turn this dress from too short to... some things that were still pretty short. (also, please excuse the amount of cat hair in these photos. I am a terrible disaster of a person.)

Striped Dress Refashion

The first part of this refashion was really simple. All I did was lay my dress flat and chop off the bottom hunk in order to start turning this into a simple top.

Striped Dress Refashion

Although this is a knit fabric and therefore doesn't fray, I still folded the hem up once and ran a zig-zag stitch all the way around it just to give it a bit more polish.

Striped Dress Refashion

And just like that, this piece went from a too-short dress to a more acceptable length top. I didn't want to waste the extra fabric so I decided to take this refashion a step further (to be fair though, I never throw away any of my fabric scraps for environmental and crafty reasons that I can talk about at a later date maybe).

Striped Dress Refashion

For part two, I started by taking the extra piece of fabric and cutting it in in half.

Striped Dress Refashion

I then took those two pieces and pinned and sewed (again, zig-zag stitch) them together so that my top would have more length to it.

Striped Dress Refashion

After measuring this piece against my body, I decided that it was just a bit too long, so I took off some of the length and hemmed my bottom edge the same way I did for my first top.

Striped Dress Refashion

With right sides together, I folded the top in half, pinned the raw edges, and sewed the back of the top closed.

Striped Dress Refashion

I then took the piece of fabric that I trimmed off earlier and chopped that piece in half again.

Striped Dress Refashion

And then I folded each piece in half, pinned the edges, and sewed down the long edge. After sewing them down, I turned each piece right-side out in order to make my straps.

Striped Dress Refashion

Finally, I sewed my straps on in the locations that seemed best and adjusted the length of the straps so that they were not too long or too short. I also did a tiny little pinch and gather at the front of the top but I forgot to photograph that part, so my bad.

Striped Dress Refashion

But now I have a fun little crop top that is totally winter appropriate. I'm pretty jazzed about the way that the back looks at least. I could lie and say that I planned it that way, but we all know that I do not have that much sewing foresight. Ayyy, happy accidents.

For now I'll be stashing this away with the rest of my tanks, but hopefully I can get good use out of both of these new tops come summer time!


Linkin' up:
x x

Monday, May 25, 2015

Denim Shirt Refashion

Because who doesn't love a good ol' refashion, right?

I feel like this refashion really captures the essence of how much of a piece of trash I am. Like....I actually made the whole thing almost a year ago, but didn't get around to photographing it until just recently. I know, I know, I am garbage. But I'm okay with that. Because who honestly has that kind of control over their life, right? Right? Ehhhhhh...

But anyway, here is the pièce de résistance:

Denim Shirt Refashion

And it isn't even that huge of a deal of a refashion. Like, I literally have no excuse as to why I didn't photograph this. I'm so sorry, I AM UNWORTHY.

Denim Shirt Refashion

My saving grace though is that I did take pictures along the way while making this, so at least I can explain what I did. I first started by putting the shirt on and pinning a line at my natural waist so that I could chop the top of the shirt from the bottom.

Denim Shirt Refashion

I then removed the pocket...

Denim Shirt Refashion

...and the sleeves. (Look, you can even tell how old this picture is. That's def the carpet from my old apartment from school last year.)

Denim Shirt Refashion

I then took a little more off the the sleeves and pinned where I wanted to take the shirt in at the sides before sewing in my new side seams and finishing off the new arm holes.

Denim Shirt Refashion

Finally, I pleated the bottom part of the shirt so that it was the same length as the top part of the shirt before attaching the two together ( I also decided to do some hemming of that bottom portion so that it didn't fray.)

Denim Shirt Refashion

So this was super quick, super simple, but I feel like it was a pretty legit improvement. Even if the original said "80's pinpoint" on the inside, I don't know what that means, but I'm on board for whatever that entails.


Linkin' up:
x x

Tuesday, April 7, 2015

White Blouse Refashion

Is it weird that I did not own a single plain white blouse before getting this shirt to refashion? I feel like there might be something wrong with that...

Ah well, the situation has been remedied, with a twist kind of?

I got this shirt from the thrift store for like a dollar or something, but it was way too big and lifeless on me. So after an afternoon of work and playing around with weird ideas, I think this is a much improved version:

White Blouse Refashion

Can you def tell that I got this over the summer and then let it sit on my refashion pile for forever? That's how I function.

White Blouse Refashion

I started by first putting the shirt on inside-out and pinning it in so that the overall fit was better. (Take note of that ominous black shape in the corner. Take a wild guess as to what happened next.)

White Blouse Refashion

Ah yes. Ah good. No sewing project is complete without Kitty putting his large body over top of everything. Wow.

White Blouse Refashion

After sewing up the sides, I folded up the collar and added a matching white button in line with the other buttons on the shirt. I also added a button hole on the other side of the collar, making sure the shirt would lay flat before cutting it out. I did the stitching for the button hole by hand because let's be real. I'm too much of a giant baby to try and add the hole by machine.

White Blouse Refashion

Using my pinking shears, I cut off the extra fabric from the sides of the shirt where I stitched it earlier. And here was where I decided to go a little different than just having a plain white blouse:

White Blouse Refashion

I took those extra pieces of fabric and right sides together, I pinned them and stitched the bottom and the pinked (is that even a term?) sides and left the tops open.

White Blouse Refashion

Then all I had to do was flip them right-sides out and top stitch all the way around.

White Blouse Refashion

Lastly, I just took the tie pieces, tucked them under the collar and hand stitched them on.

White Blouse Refashion

Aaaand, much improved now I'd say. My roommate gave me that brooch and I thought it would be perfect with this so why not. Like it looks fine just tied, but yeah. Fancy brooches are legit, right?


Linkin' up:
x x

Saturday, January 10, 2015

Polka Dot Skirt Refashion

Sometimes I start to go about a refashion, I get all in the groove, and then I have to step back and say "What. What are you doing.Why are you doing this."

This refashion, my friends, was one of those cases.

Polka Dot Skirt Refashion

I got this skirt from the Goodwill for a dollar and although floor-length button up skirts scream high fashion, I thought it would be good to change it up.

The weird thing about this skirt though was that even though it had a buttoned waist, it also had an elastic waist band which was still entirely too big for my waist. So I decided to do the most back-asswards thing I could think of to fix this situation.

(Get psyched for some really bad pictures in terrible lighting aw yeah.)

Polka Dot Skirt Refashion

I started off by unbuttoning the entire skirt so that it was completely open (that's attractive). I then used my pinking shears to separate the waist band from the skirt itself, leaving about an inch of seam allowance.

Polka Dot Skirt Refashion

I then measured the waist band against my own waist, pinned off the extra room on each side, and then sewed the elastic down so that the entire thing felt comfortable.

Polka Dot Skirt Refashion

With the remaining fabric, I compared it to my body and decided that I wanted it at more of a knee-length, rather than a floor length. So I cut a few inches off the top of the skirt (so that I wouldn't have to re-hem the bottom) and ran a gathering stitch along that top edge.

Polka Dot Skirt Refashion

All I had left to do was reattach my waist piece to the body piece of the skirt, which I did by using the gathers to manipulate the body into being the same length as the waist.

Polka Dot Skirt Refashion

And now I am a beautiful polka-dotted baby bird who still doesn't know how to pose for pictures. Fly away baby bird-- off to your destiny.

In retrospect, I supposed I could have just, you know... hemmed the skirt and took the waist in normally, but at the time, this method made more sense to me. I had to take the waist in a lot, and I was afraid that if I just sewed down the sides, the skirt would be too clingy. Hence the cutting off the waist and gathering the bottom. At least this way, the skirt stayed a little fuller. Ah well.

Has anyone one else had this sort of refashioning situation before? Where you literally have to be like "Woah.What."
Because I feel like that happens to me at least once during the course of every sewing project haha.


Linkin' up:
x x

Sunday, November 16, 2014

80's Dress to Hi-Lo Skirt Refashion

Greetings good people :]

I know that I've been pretty absent lately, and that makes me mega-sad, but hopefully I can do something about that! A lot has happened for me personally over the past... however long it's been, including moving away from all my people, getting my first big-kid post-grad job, and other various hiccups that come along with living in the real world.

But I have been at least somewhat creative in the meantime!

For example, I have done a few refashions, as well as worked on a few art pieces, which I hope to share some time soonly. In the mean time, here's a thing that I did manage to work up:


80's Dress to Skirt Refashion

Gosh, I do love me some ridiculous 80's patterns [as well as giant 80's hair, which I decided to rock today]. They're just so ridiculously fab, how could you not love... whatever that is?

This refashion was not what I initially intended it to be. Originally, I thought that I was just going to keep it a dress because I loved that great gold button at the collar, but, well.. you'll see.

80's Dress to Skirt Refashion

I started off by taking out the shoulder pads because while the linebacker look is great, it's just not my deal.

80's Dress to Skirt Refashion

Then I started cutting off one of the arms of the dress following the curve of the weird shoulder-region.

80's Dress to Skirt Refashion

When I got to the other sleeve though, I ran into a major snag. I got a little zesty with the scissors and cut the curve way too far, practically all the way to where the buttons are. Oops. Wild woman over here. So I decided to go a different route because yay problem-solving.

80's Dress to Skirt Refashion

I decided that this dress actually wanted to be a skirt the entire time, so I gave into its wishes and cut the whole bottom of the dress off.

80's Dress to Skirt Refashion

I then folded it my raw edge over once very small-like and sewed that down. I then folded it over again to create a casing for some elastic to be threaded through. I left a small section open though so that I could put the elastic in.

80's Dress to Skirt Refashion

I measured a piece of 1" elastic around my waist so that it was comfortable, then added about an extra inch to that measurement so that I'd have a seam allowance.

80's Dress to Skirt Refashion

I threaded the elastic through the hole in the casing, then sewed the two ends of the elastic together...

80's Dress to Skirt Refashion

...and then I closed the hole in the casing.

80's Dress to Skirt Refashion

All I had left to do was give my skirt a subtle hi-lo hemline by folding the skirt in half and cutting the hem on a slight curved angle. Then I hemmed up my raw edge and BOOM. Done.

80's Dress to Skirt Refashion

Although this refashion wasn't what I expected or intended, I quite like the result! The hi-lo effect is not over the top, so I kind of like the subtlety of it all. I guess this refashion was just one of those happy accidents :]

So, any other accidental refashions out there?
I'll be linkin' mine up, for sure
x x x

Sunday, January 19, 2014

Teal Flowered Dress Refashion

Hey hey~

I have a little refashion to share with y'all that I finally managed to photograph last week:

Teal Flowered Dress Refashion

I got this dress at Goodwill over the summer for only a dollar, but I didn't get around to fixing it up until over winter break. And now it's gone from "buuh" to "eeeeh, she still probably needs help learning how to dress herself" haha.

Teal Flowered Dress Refashion

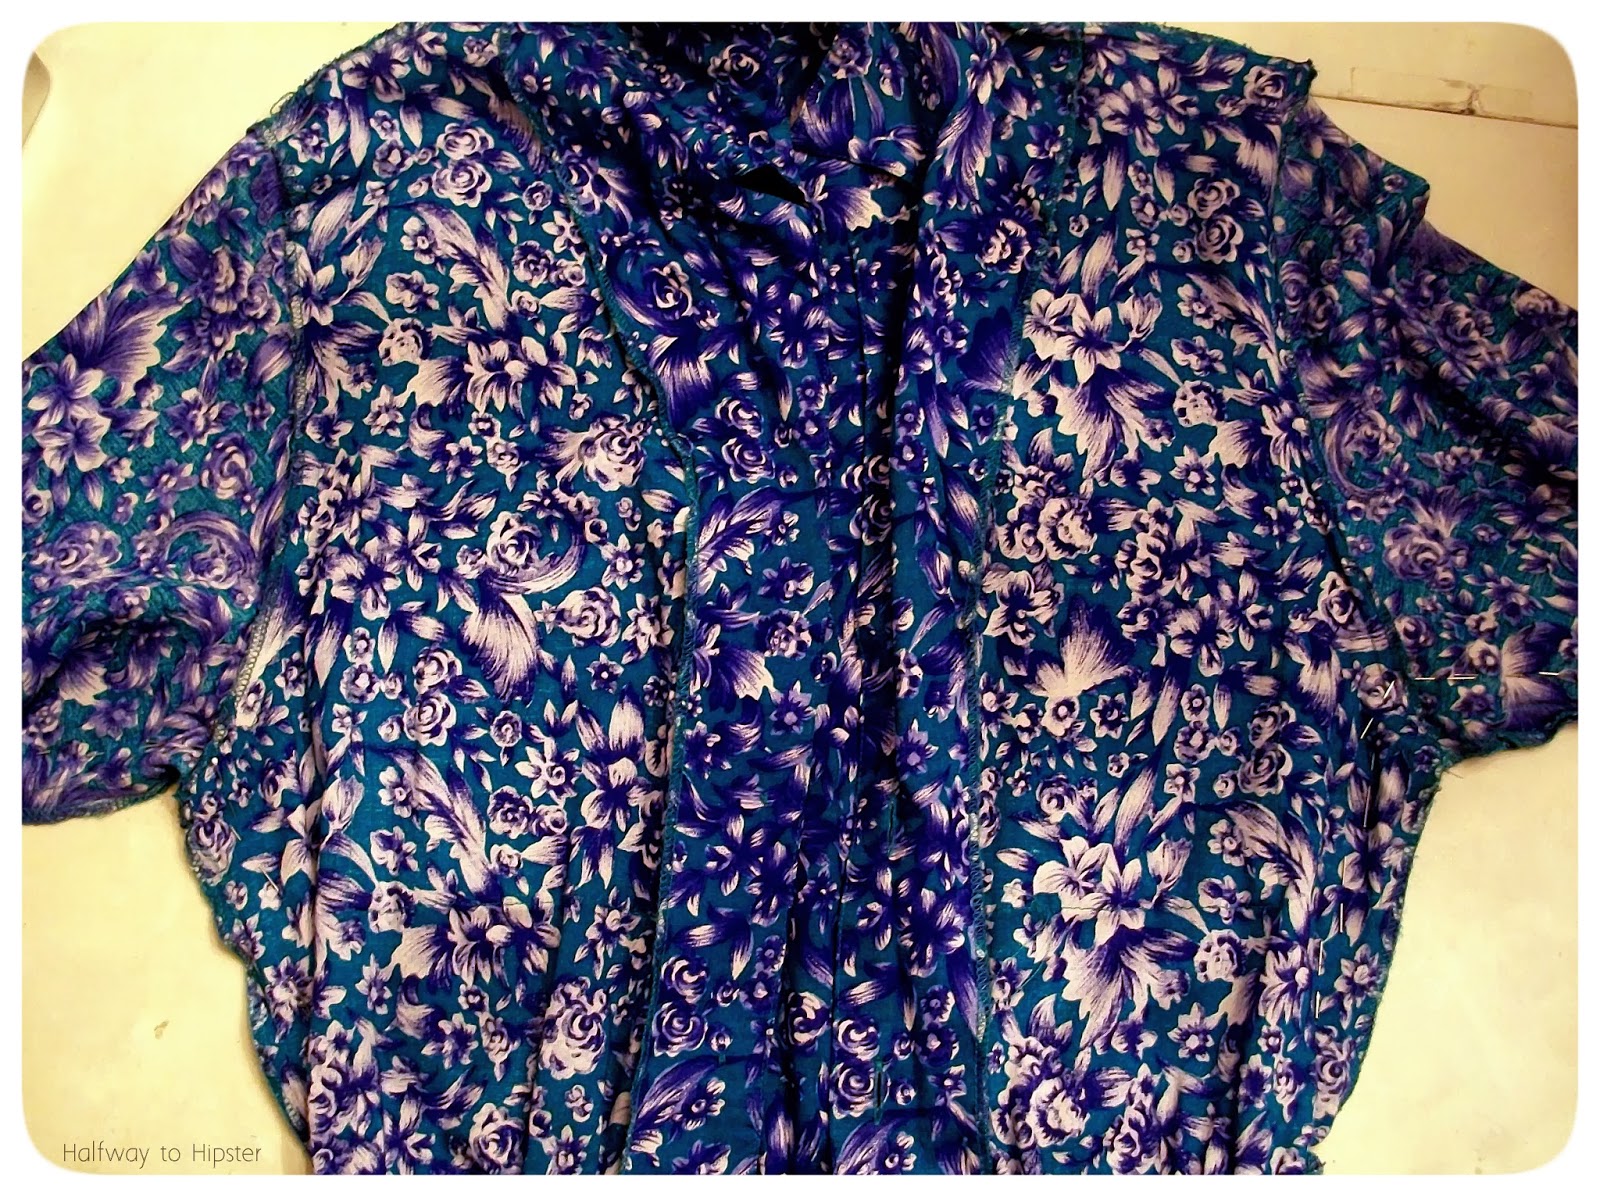
The first thing I did was chop out the shoulder pads, which Kitty one hundred percent approved of. Seriously, I wouldn't know how to fashion if it wasn't for him.

Teal Flowered Dress Refashion

Then I chopped about four or five inches off of the bottom. Because while I enjoy frumpy, this was just a little too frumpy.

Teal Flowered Dress Refashion

And of course put in a new hem!

Halfway to Hipster: Teal Flowered Dress Refashion

I wasn't really feelin' the sleeves either, so I chopped most of them off.

Teal Flowered Dress Refashion

Then before I hemmed off the sleeves, I decided to take in the sides a little, just because the top was a little bit too big on me still.

Teal Flowered Dress Refashion

Finally, I hemmed up the sleeves and all was right in the world! Awww yeah.

Teal Flowered Dress Refashion

[I clearly know how to take pictures] And booyahmozzarellasticks, another refashion in the bag. I really don't know why I always gravitate towards crazy prints, but you have to admit-- at least they're interesting haha.


But hey, weirdly enough, my pile of "to be refashioned" items is almost depleted, which mean OH DARN I'll have to go thrifting soon. I'm sure my roommate Krispy won't mind being dragged either... [which reminds me sidenote Becca/Krispy decorating tip number one: if you don't have at least three American flags in your apartment, you might be doing it wrong.]

That's it for now!


Linkin' up:
x x x