First thought: Is that plaid I spy?
Second thought: WAIT IS THAT FLANNEL??
Good news, self. It both.
They were just these 3 yard rolls of flannel that were only 5 bucks each, so I got two of them. Fast forward to present day and I finally made a thing:
I thought about making just another regular circle skirt because let's be real- you can never have enough of those. Or at least that's just what I keep telling myself so that I can sleep better at night. This time though, I decided to try out a hi-lo style and I'm per' excited about the result. So here is how it went!
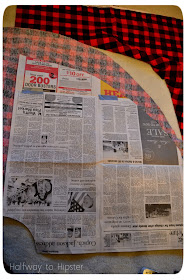
I started off by rolling out my fabric just to see the dimensions and I made a paper pattern. For how to make the paper pattern and do your measurements, you can refer to my post about making circle skirts.
I then [with the help of Kitty] cut out just one quarter of my skirt. How I did this was instead of folding my fabric at all, I laid my quarter-skirt pattern out on just one layer of fabric and cut it out. No folding or anything required.
After cutting out the one quarter, I proceeded to flip and lay my pattern down again and cut out a second quarter. These two regular pieces are what I used for the high front of the skirt.
For the back of my skirt, the "lo" part of the hi-lo equation, I started out by tracing out my quarter-pattern twice right next to each other, flipping halfway through the process so that I traced out a half circle instead of just the quarter circles like I did for the front of the skirt. Now, instead of cutting the exact shape of my pattern, I cut it so that the back angled down further, so that it would create a low effect.
I forgot to photograph this part, but I assembled the skirt by just sewing my two front quarters together and then sewing them to the back half.
With my remaining fabric, I cut out a waistband that was about four inches wide by my waist+2 inches [actually, I think I only did it about an inch and a half bigger than my waist, but two inches is a safe bet if you're worried about it not fitting].
Like with all my waistbands, I folded the fabric in half and ironed it down.
I then opened it back up and folded the edges halfway to my center crease.
I attached the waistband to the skirt by encasing the top of the skirt fabric inside the little refolded waistband and running two lines of straight stitches around the whole deal. I should also note that I cut a line for the zipper in the middle back of the skirt before I attached the waistband.
To finish the skirt off, all I did was insert a zipper, make a matching bandanna for Kitty, and just like that we are matching wonder babies.
Now here, have a baby bird pose. Because we all needed that.
And some sweet hi-lo action. I should really stop taking photos at awful times of day when there is no light left. Shame on you Becca. Stop bringing dishonor to your family.
But anyway, there we have it! This skirt was pretty simple to make, and nothing beats the feeling of being a girly lumberjack child [if you've never tried that aesthetic, I highly recommend it.].
Linkin' up:
x x


