I feel a little weird about posting a refashion like this considering it's still quite clearly winter outside, BUT, in my defense it has been an unseasonably warm winter by me.
... as in it's been in the high 20's, low 30's, which is like crazy warm for here. Shhh, just let me justify posting about crop tops in January.
But quite some time ago, like an embarrassingly long time ago, I was visiting Carolyn when her neighbor was getting rid of some old clothes and ended up gifting me this dress:
Now, you may be thinking-- Becca. That is a perfectly fine dress. Why would you mess with that?
While yes I agree it's a fine dress, it's just a little too short for my liking. As in, if I were to bend over, I might get charged with public indecency. And while I like to live life on the edge, I'm not that edgy so... yeah.
So, I finally turned it into not one, but two new things. Look at me go.
Here is what I did to turn this dress from too short to... some things that were still pretty short. (also, please excuse the amount of cat hair in these photos. I am a terrible disaster of a person.)
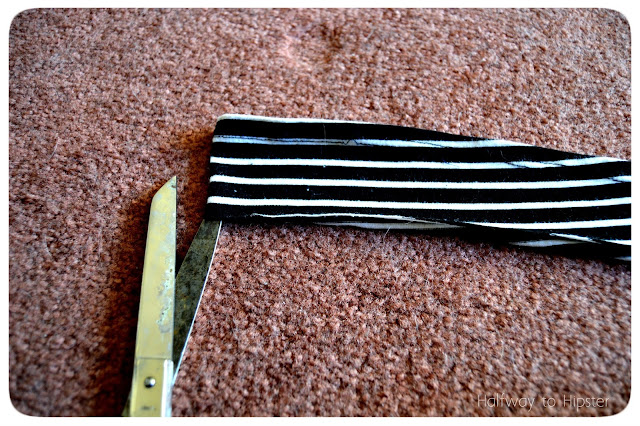
The first part of this refashion was really simple. All I did was lay my dress flat and chop off the bottom hunk in order to start turning this into a simple top.
Although this is a knit fabric and therefore doesn't fray, I still folded the hem up once and ran a zig-zag stitch all the way around it just to give it a bit more polish.
And just like that, this piece went from a too-short dress to a more acceptable length top. I didn't want to waste the extra fabric so I decided to take this refashion a step further (to be fair though, I never throw away any of my fabric scraps for environmental and crafty reasons that I can talk about at a later date maybe).
For part two, I started by taking the extra piece of fabric and cutting it in in half.
I then took those two pieces and pinned and sewed (again, zig-zag stitch) them together so that my top would have more length to it.
After measuring this piece against my body, I decided that it was just a bit too long, so I took off some of the length and hemmed my bottom edge the same way I did for my first top.
With right sides together, I folded the top in half, pinned the raw edges, and sewed the back of the top closed.
I then took the piece of fabric that I trimmed off earlier and chopped that piece in half again.
And then I folded each piece in half, pinned the edges, and sewed down the long edge. After sewing them down, I turned each piece right-side out in order to make my straps.
Finally, I sewed my straps on in the locations that seemed best and adjusted the length of the straps so that they were not too long or too short. I also did a tiny little pinch and gather at the front of the top but I forgot to photograph that part, so my bad.
But now I have a fun little crop top that is totally winter appropriate. I'm pretty jazzed about the way that the back looks at least. I could lie and say that I planned it that way, but we all know that I do not have that much sewing foresight. Ayyy, happy accidents.
For now I'll be stashing this away with the rest of my tanks, but hopefully I can get good use out of both of these new tops come summer time!
Linkin' up:
x x
Saturday, January 23, 2016
Sunday, January 10, 2016
DIY Collar Clips
Long time no chat, eh? It's only been roughly.... 6000 years I believe.
Despite popular opinion, I have been doing things though! I've been tied up in a lot of different creative projects (but mostly just a lot of personal projects) over the last few months, so I have not had time to post anything. Excuses, excuses, I know. But hey! I do have some things at least that I plan on sharing before I disappear into another inevitable hiatus.
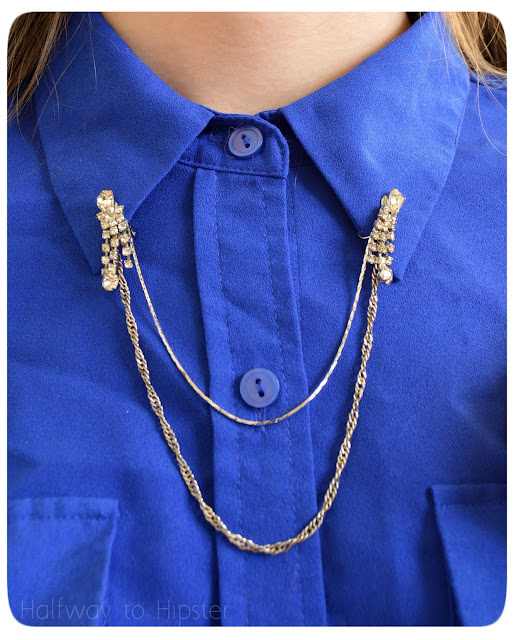
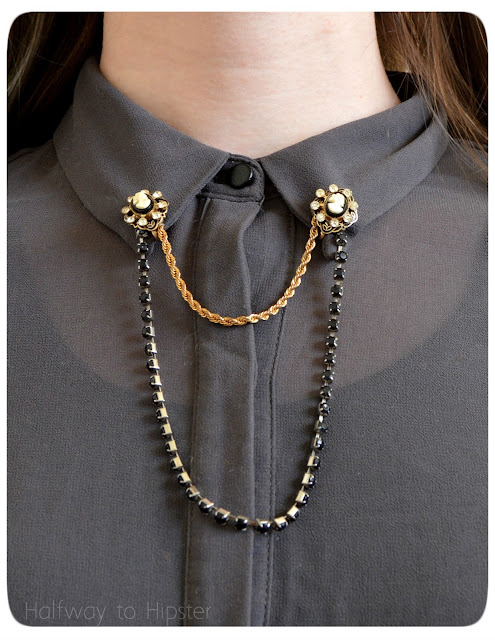
One of those things are these collar clips I made:
I started with materials that I already happened to have on hand: E6000 glue, pliers, and some old jewelery. The clip part of the collar clips were made with two pairs of clip-on earrings that different people had given me in the past. The faux diamond ones were my grandmas that she gave me and I was thrilled that I could finally find a use for them (I can't wear clip-on earrings due to the fact that I have too many ear piercings that I'm too lazy to take out.) The chains were just broken bracelets that I have been accumulating because I am a hoarder I knew that I could find a use for them.
The first thing I did was use the pliers to remove the clasps from the bracelets and trim the chains to the lengths I wanted.
Then, using the E6000, I glued the chains to the backs of the earrings, making sure that the chains didn't sit wonky.
After that, all I had to do was let them dry, making sure that the chains didn't slip out of place as they were drying.
And that was it. It was really that simple (though I realize now that I didn't focus these pictures very well. Shame on you, Becca).
But hey, I still think they look pretty jazzy. Now, to figure out how to make some moon clips...
Linkin up:
x x
Despite popular opinion, I have been doing things though! I've been tied up in a lot of different creative projects (but mostly just a lot of personal projects) over the last few months, so I have not had time to post anything. Excuses, excuses, I know. But hey! I do have some things at least that I plan on sharing before I disappear into another inevitable hiatus.
One of those things are these collar clips I made:
Lately I've been really loving buttoning my blouses all the way to the top. I don't know why, but it just feels more fun to have that top-button swag going on. And because of that, I felt the urge to try out the whole collar clip idea (is that even what they're called?).
The first place I saw them in action was with Clara in the episode "The Caretaker" of season 8 of Doctor Who, and while I still want to replicate hers, I think these will suffice for now.
 |
| Source: x |
Can I just state the homegirl's fashion sense is so good? She's probably one of my favorite companions in terms of fashion sense... There are some other companions who should not have been allowed to dress themselves though (coughcoughrose).
But I digress. Here is how I made mine; they were crazy easy to do for myself:
The first thing I did was use the pliers to remove the clasps from the bracelets and trim the chains to the lengths I wanted.
Then, using the E6000, I glued the chains to the backs of the earrings, making sure that the chains didn't sit wonky.
After that, all I had to do was let them dry, making sure that the chains didn't slip out of place as they were drying.
And that was it. It was really that simple (though I realize now that I didn't focus these pictures very well. Shame on you, Becca).
But hey, I still think they look pretty jazzy. Now, to figure out how to make some moon clips...
Linkin up:
x x
Subscribe to:
Posts (Atom)


