Monday, June 22, 2015

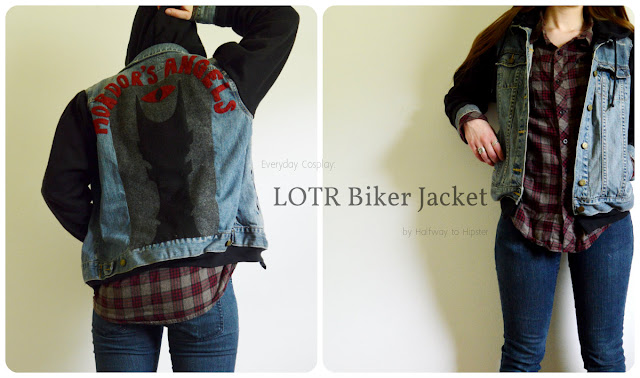
Everyday Cosplay: LOTR Biker Jacket

Do you ever start reading something or watching something with the intention of just ah yes, I will become a casual fan. That was me with Lord of the Rings until it consumed my soul. I'm in too deep, man. There is no going back.

But you want to know what? I'm perfectly fine with that because it makes me end up creating little beauties like this recent monstrosity:

Lord of the Rings Biker Jacket


I've seen these half denim/half sweatshirt jackets in stores before, and thought that I could make one for myself because it can't be too complicated, right? But then things got away from me and oops. Lord of the Rings. But hey hey, woah. Hear me out. Like look at how punny this is... like Hell's Angels... but instead it's Mordor's Angels? Get it? GET IT? Shhhhh, I'm hilarious.

And in reality, though a little bit time consuming, this was actually really easy to make!

Lord of the Rings Biker Jacket

I started out by taking two things that I already had in my closet that I no longer wear. The zippy sweatshirt is from a million years ago and the jacket is my mom's that she did not want. So basically, I made this whole thing with little to no costs; I just reused old materials that were just going to waste. Yaaaaay not being wasteful.

Lord of the Rings Biker Jacket

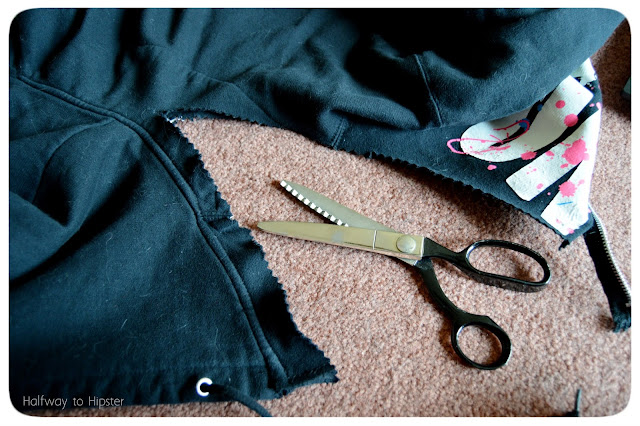
Using a seam ripper, I started off by removing the zipper from the sweatshirt. (And now I have a full length zipper that I can easily use in another sewing project.)

Lord of the Rings Biker Jacket

I then removed the hood of the sweatshirt, making sure to cut about an inch below the seam so that I could use that inch as seam allowance.

Lord of the Rings Biker Jacket

I then removed the sleeves, again cutting about an inch in from the original seam.

Lord of the Rings Biker Jacket

I then attached the hood to the jacket by folding up the collar, pinning the hood inside, and sewing down the extra inch of fabric with a straight stitch.

Lord of the Rings Biker Jacket

Using my pinking shears again, I took the sleeves off the jacket. Only this time instead of cutting into the body of the jacket, I cut to the right of the seams, leaving an extra inch of the sleeves to use as my seam allowance.

Lord of the Rings Biker Jacket

In order to attach the new sleeves, I started by turning the jacket inside out. Then, with the sweatshirt sleeves right-side out, I tucked them inside the jacket and pinned them in the armhole.

Lord of the Rings Biker Jacket

Since the new sleeves were a little bigger than the old sleeves, I did have to fidget with it a little and do a few gathers here and there before sewing them together right along the old denim seams.

Lord of the Rings Biker Jacket

It was at this point that Kitty decided to tell me you shall not pass. Cue slight delay in project.

Lord of the Rings Biker Jacket

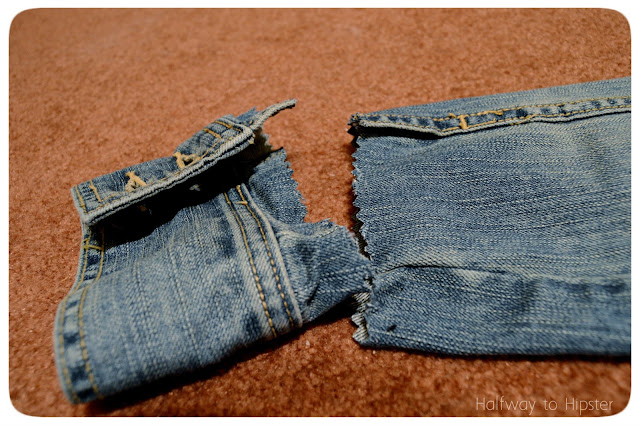
Since the sleeves were a little short on me, I decided to extend them by cutting off the cuffs of the jacket and sew them to the inside of the sweatshirt sleeves.

Lord of the Rings Biker Jacket

I also decided to cut off the bottom of the sweatshirt and add it to the bottom of the jacket.

Lord of the Rings Biker Jacket

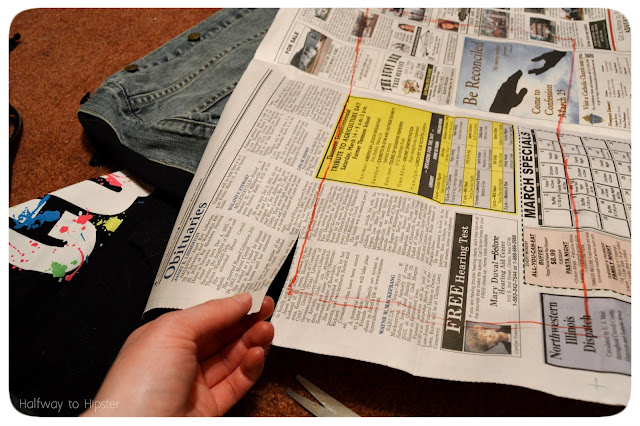
Finally, once I got the jacket constructed, I could start on the back of the jacket. I started by first laying some newspaper on the back of the jacket and tracing out how big I wanted the back patch to be. I then cut it out, folded it in half and trimmed it so that everything would be symmetrical.

Lord of the Rings Biker Jacket

I then pinned this to some felt, cut it out, and topstitched it onto the jacket.

Lord of the Rings Biker Jacket


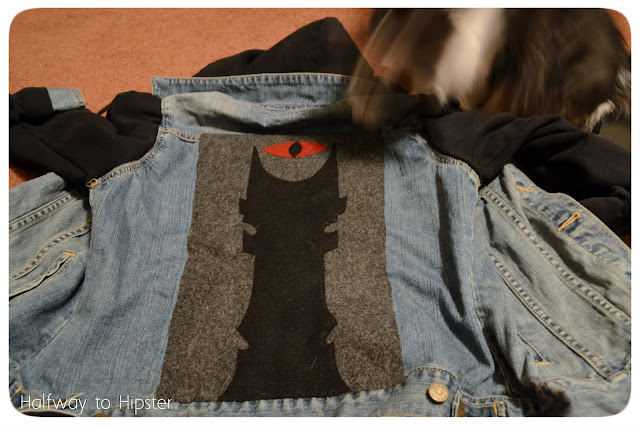
For the symbol, I looked up a picture of the tower of Barad-dûr on my smellphone and sketched out half of it like so. That way, when I pinned it to the fold of another piece of felt and cut it out, it was already symmetrical.

Lord of the Rings Biker Jacket

Once I got that all cut out, I topstitched it all onto the felt panel. Also, please appreciate how creepy this picture of Kitty is. Yay for long exposures and moving cats.

Lord of the Rings Biker Jacket

The final step was to add the words. I drew them out on some newspaper, and kind of just went with it. I could have made the font actually look nice, but at this point in time, I was just too stoked to have this done.

Lord of the Rings Biker Jacket

I cut all the letters out, pinned them to my felt backwards, and traced them out. I decided to do them backwards so that the pen wouldn't show up on the other side, which made for a cool clean effect.

Lord of the Rings Biker Jacket

Finally, after cutting out all of the letters, I pinned them where I thought then would look good and stitched them all down by hand (actually, everything on the back is hand-stitched btw).

Lord of the Rings Biker Jacket

And that was it! I'm not going to lie, this is probably one of my favorite things I have ever sewn (besides the Thranduil Dress). Like I'm just so jazzed about the outcome. I have not encountered someone else who has gotten the reference yet, but ONE DAY I WILL. And I'm sure that it will be a glorious occasion.

Lord of the Rings Biker Jacket

It's like in case you didn't already know that I'm a giant nerd baby, let's make horrible puns about it. And then put them on my body. Living the dream, I tell you. Living it.

So what do y'all think? Would you ever wear something that is secretly nerdy? I feel like it would be fun to make another, but what fandom would I even go with? I'd love to hear your thoughts!


Linkin'up:
x x

Saturday, June 6, 2015

Librarian Dream Dress

Story time:

So once upon a time during my junior year of college I was walking home from an afternoon class, you know just minding my own business and such. I decided to mildly dress up that day because it was nice out and because why not. I had on a high-waisted skirt that I had belted, and some top of which I don't quite remember. But anyway, I had almost gotten back to my apartment when I crossed the path of some younger children (by children, I mean like.... freshmen who were only a year or two younger than me) who were sitting on a roof yelling things at people. When I walked by, one girl looked at me and kind of scrambled to say "You look like a librarian." And all I could think to say back was, "Yes. Thanks. That's what I was going for."(because to be honest, I probably really was going for that) Then I smiled and continued on my way while she gave me the most condescending, bewildered look.

The reason why this throws me off is because I genuinely don't know... was that supposed to be an insult? A compliment? An observation? I take it as a compliment, but I think she was trying to offend me. Considering the fact that I lived at the library (No joke. Slept there, brushed my teeth there, you know, normal stuff) I take that to be a certain degree of praise.

Where was I even going with this story? We just don't know.

Oh, it has something to do with this dress I made:

Librarian Dream Dress

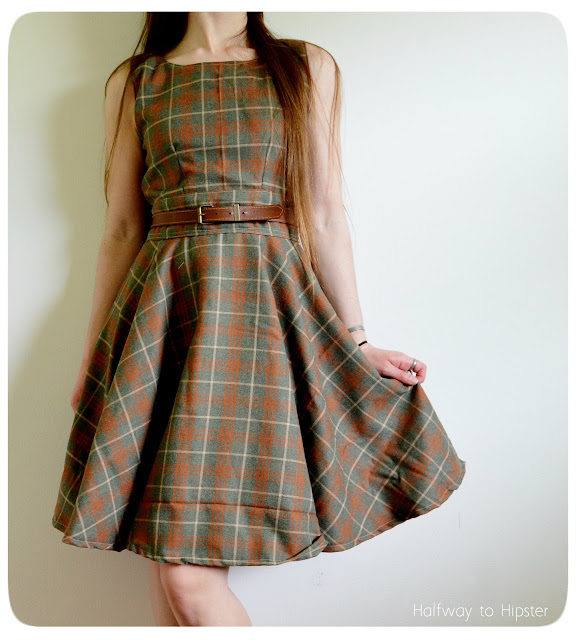
That's right kids, I have finally made my first completely self-drafted dress. It was kind of an adventure since I've never gone fully pattern-less on a dress before, but I'm so stoked about the final outcome. It's like... If I was genuinely a stereotypical librarian like that girl had said, this would be my prefect dress. Hands down. Care to see how I made it? Then read on: (Prepare for an image heavy post, yo.)

Librarian Dream Dress

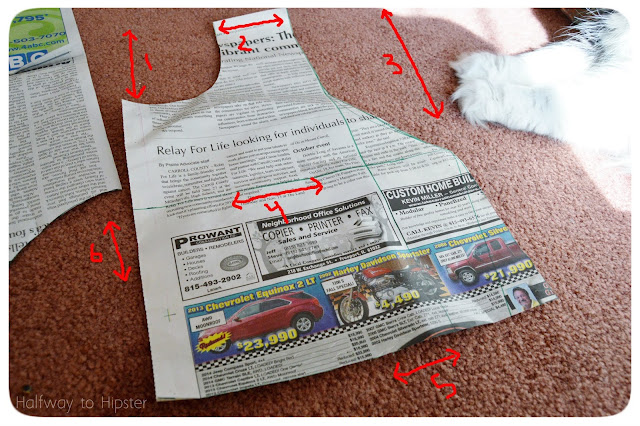
After poking around the internet for a while and looking at some other patterns that I had, I found out that I needed a few different measurements to make the bodice. (Do you like my jank drawn on measurements here? Can you tell I went to art school yet?) They were:
1. How far I wanted the neck to come down
2. Width of the strap
3. Armpit hole length. I'm sure that there is a more technical term for this.
4. Bust divided by 4
5. Waist divided by 4 (which actually, I ended up just keeping the same length as my bust and fit it with darts later)
6. How far I wanted the bodice to come down

To all of these measurements, I added on seam allowance too, just because I was super paranoid about everything being too small.

Librarian Dream Dress

For the skirt, I just used a circle skirt pattern that I had made for a previous project. If you've never made a circle skirt before, I've posted about it here.

Librarian Dream Dress

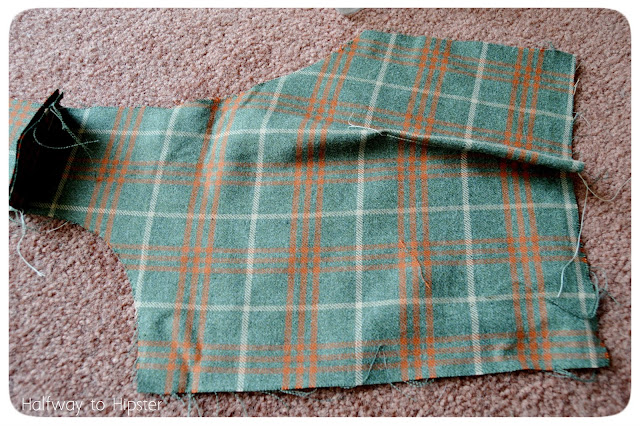
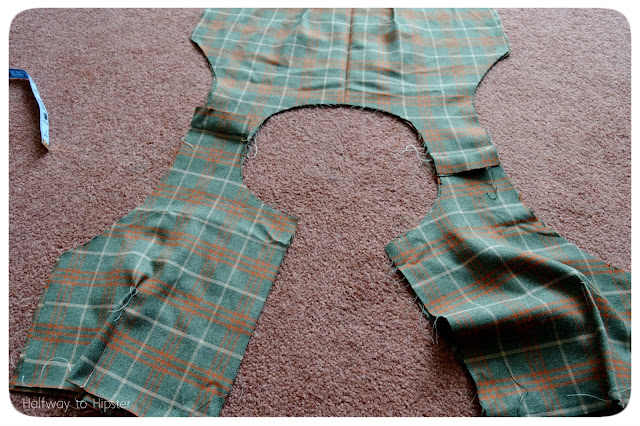
Once I had my patterns made, I began cutting them out of my fabric. The fabric I got for a totally awesome deal-- I found about three yards of it at the thrift store for some ludicrous amount like... four bucks or something. It just looks so 70's to me and I love it. But since I had so much fabric, I had enough to line the bodice as well. So, I cut two of these on the fold of the fabric, and four that were not on the fold of the fabric.

Librarian Dream Dress

Since the fabric wasn't quite big enough to cut my entire circle skirt out as one piece, I traced the pattern twice on the fold to make my skirt.

Halfway to Hipster: Librarian Dream Dress

To attach the skirt to the bodice, I also cut out a waistband which was about... idk... 5 inches by my waist measurement (plus and inch for seams).

Librarian Dream Dress

Once I had everything cut out, I started the whole assembly process. I first pinned the front of my bodice pieces to their corresponding back panels just at the shoulders and sewed that down. I then used darts in both the front and the back to taper the bodice so that it fit my waist better. This involved a little math and pinning and unpinning the sides and trying it on to make sure I wasn't taking it in too much. Basically, I just wanted that bottom edge to be the same width as the waistband I cut out.

Librarian Dream Dress

See. Darts.

Librarian Dream Dress

Next, I laid my pieces on top of one another right-sides together and made sure that everything lined up.

Librarian Dream Dress

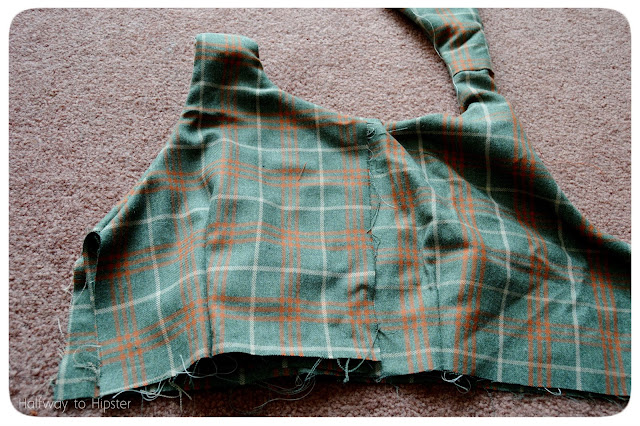
Once I was sure that everything lined up, I pinned down the armpit holes and neckline and sewed these together.

Librarian Dream Dress

To turn the bodice right-side out again, I had to shove those back panels through that tiny opening that is the straps. I don't really know how to explain that, but does the picture kind of make sense? Basically, it was like the bodice had to give birth to itself.

Librarian Dream Dress

But once I managed to deliver the top, it looked like this. So I lined up the sides and made sure that it looked fine in that regard.

Librarian Dream Dress

To finish off the bodice, I had to do another thing that is kind of hard to explain. Instead of having raw, fuzzy edges on the inside, what I did was first pin just the two innermost layers together. This allowed me to open up the whole top, pin the outermost layers together, and sew the whole side seam as one straight line. I know that doesn't really make sense, but it's super hard to explain so hopefully the picture makes a bit of sense? Once that was done, all I did was topstitch the neckline and arm holes.

Librarian Dream Dress

Once I tried on the bodice and made sure it fit, I attached the top to the bottom using my waistband piece, which I made nice looking by doing all my attaching on the inside of the dress.

Librarian Dream Dress

The final step was just to pin in a zipper, make any last size adjustments with those pins, and then just sew the zipper in. I mean, there are still a few fit issues with this, but I'm still super stoked with the outcome. I didn't think that I'd ever trying making a dress completely from scratch, but here we are. What a time to be alive.

Librarian Dream Dress

Dang roof girl, if only you could see me now...

So what do y'all think? Any advice on how I could do better for next time? Any advice on pattern-making is MORE than welcome because I am still such a novice.


Linkin' up:
x x