Because who doesn't love a good ol' refashion, right?
I feel like this refashion really captures the essence of how much of a piece of trash I am. Like....I actually made the whole thing almost a year ago, but didn't get around to photographing it until just recently. I know, I know, I am garbage. But I'm okay with that. Because who honestly has that kind of control over their life, right? Right? Ehhhhhh...
But anyway, here is the pièce de résistance:
And it isn't even that huge of a deal of a refashion. Like, I literally have no excuse as to why I didn't photograph this. I'm so sorry, I AM UNWORTHY.
My saving grace though is that I did take pictures along the way while making this, so at least I can explain what I did. I first started by putting the shirt on and pinning a line at my natural waist so that I could chop the top of the shirt from the bottom.
I then removed the pocket...
...and the sleeves. (Look, you can even tell how old this picture is. That's def the carpet from my old apartment from school last year.)
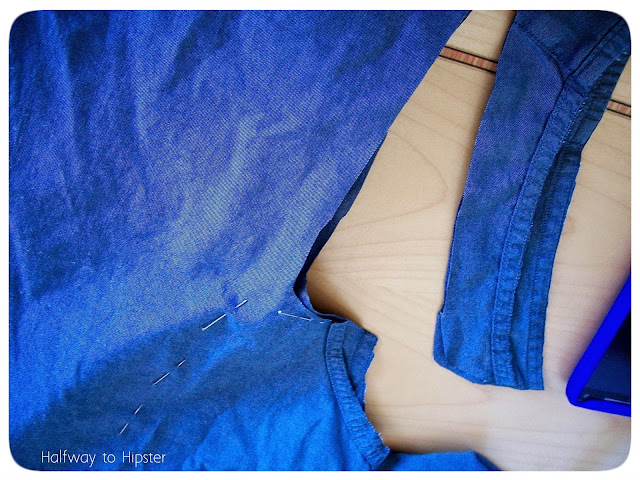
I then took a little more off the the sleeves and pinned where I wanted to take the shirt in at the sides before sewing in my new side seams and finishing off the new arm holes.
Finally, I pleated the bottom part of the shirt so that it was the same length as the top part of the shirt before attaching the two together ( I also decided to do some hemming of that bottom portion so that it didn't fray.)
So this was super quick, super simple, but I feel like it was a pretty legit improvement. Even if the original said "80's pinpoint" on the inside, I don't know what that means, but I'm on board for whatever that entails.
Linkin' up:
x x
Monday, May 25, 2015
Sunday, May 17, 2015
Easy Jersey Scarf
Greetings friends :]
So I've been up to some larger sewing projects lately, as well as I finally finished a huge piece of artwork that I'm so stoked about, but in the meantime I have a little thing to whet your appetite.
I know that everyone and their mother (literally and figuratively) has seen and probably made a jersey scarf before. They're one of Pinterest's greatest lovechilds (lovechildren?) and it isn't any wonder why. They're crazy easy to make and turn out super cute. So, some time ago, I had a go and made one for myself.
Results: yes. Good.
And although I still have a mild fear of working with knit fabrics, I am happy to report that no one died in the process of making this.
All I did to make the scarf was I started out by cutting off the selvage, which Kitty assisted in doing.
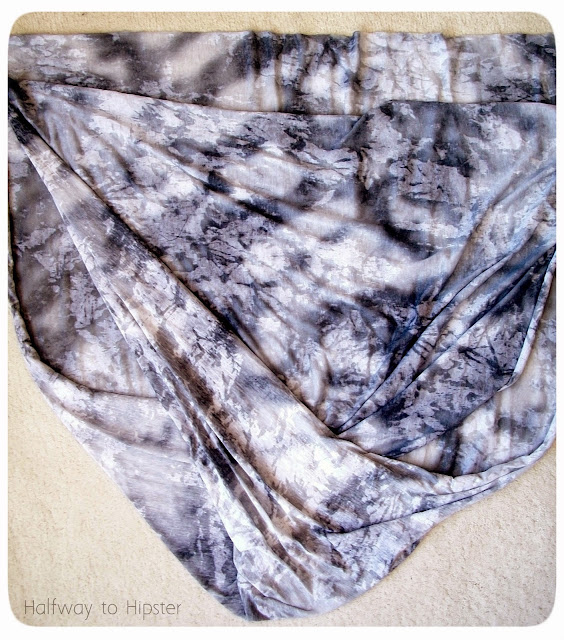
Then all I did was lay the fabric out, make a half twist, and sew the top edges together. Simple as that, yo.
I'll admit though that I did do the sewing by hand because I'm a big ol' baby wimp. One day I'll sew knits on my machine... but that day has not come yet....
And the end result is pretty lightweight and has just the right amount of slouch, which is v important in any scarf making venture. Trust me, I went to scarf college.
I know that this is just a silly, quick little project, but sometimes you need those kinds of things, right? Yes? Thoughts? Ah well.
Linkin' up:
x x x
So I've been up to some larger sewing projects lately, as well as I finally finished a huge piece of artwork that I'm so stoked about, but in the meantime I have a little thing to whet your appetite.
I know that everyone and their mother (literally and figuratively) has seen and probably made a jersey scarf before. They're one of Pinterest's greatest lovechilds (lovechildren?) and it isn't any wonder why. They're crazy easy to make and turn out super cute. So, some time ago, I had a go and made one for myself.
Results: yes. Good.
And although I still have a mild fear of working with knit fabrics, I am happy to report that no one died in the process of making this.
Originally, I found this semi-tie-dye knit fabric in the clearance section of Joann's and I really loved the pattern and color to it. There was a little less than a yard left on the bolt, so I just bought it all. I don't really remember how much I paid for it, but I do remember that it was pretty cheap, which is always a good thing.
Then all I did was lay the fabric out, make a half twist, and sew the top edges together. Simple as that, yo.
I'll admit though that I did do the sewing by hand because I'm a big ol' baby wimp. One day I'll sew knits on my machine... but that day has not come yet....
And the end result is pretty lightweight and has just the right amount of slouch, which is v important in any scarf making venture. Trust me, I went to scarf college.
I know that this is just a silly, quick little project, but sometimes you need those kinds of things, right? Yes? Thoughts? Ah well.
Linkin' up:
x x x
Subscribe to:
Posts (Atom)


